Custom Field Options After a Field is Added
The table below describes how to use each custom field option.
| Image | Option | Details |
|---|---|---|
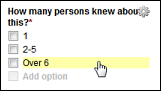 |
Label new fields and options or rename existing fields and options. |
Editable fields display a yellow background when you hover over the field. Click in the yellow area, make changes, and click out of the field to save and exit. Select Add option to add a new answer. Clear the answer text and click out of the field to delete a field. |
|
Select the gear on the field label to drop a menu of options. Make changes and click out of the menu to save and exit. 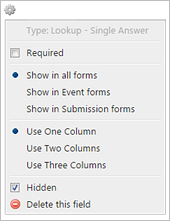
|
Type |
Displays the custom field type. This field is view-only. |
|
Required. |
Select to require users to answer the question in order to save the submission or event. A red asterisk at the end of the field label indicates the field is required. Events that were saved before making a field required are
unaffected unless a user edits the form. Upon editing, the field will be required
and the record will not be saved until the field is answered.
Note: Incidents and Supervisor Reports cannot be edited after
they are submitted.
|
|
|
Show in all forms Show in Event forms Show in Submission forms |
Select the forms where you want the field to display. Changing this after it has been used in forms affects only new submissions. |
|
|
Use One Column Use Two Columns Use Three Columns |
Select the column width for the field. This option improves the readability and display of the field. Use One Column is set by default. Fields with long text descriptions will use more columns. See the example below. Set to Use One Column 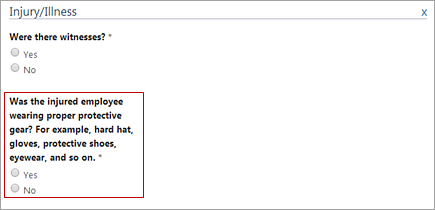
Set to Use Three Columns 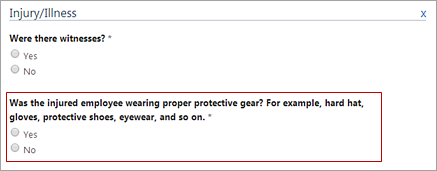
Review the fields on the submission form to make sure they display properly. |
|
|
Hidden |
All new fields are hidden by default which prevents them from displaying on event and submission forms. This is useful when preparing fields in preparation for implementing the capture of more information. You can keep them hidden until you're ready to display them. Hidden fields are not displayed on the settings page by default. However, they will initially display in gray when you first hide them. Refreshing the page or exiting and returning to the page hides them from view per the default setting. Use the options in the upper right menu (Show All Fields drop down) to display hidden fields. |
|
|
Delete the field |
Delete removes the field from prior and future submissions. Consider hiding a field if it has already been used on forms rather than deleting it. |
|
 |
Rearrange the fields |
Hover over the field until you see the hand icon and then
select and drag it to the new location. The blue bar helps you position the field.
Note: You can only move fields within a classification,
not between classifications.
|
 |
Saving changes |
A red triangle in the upper left of the field label indicates a change was made to the field or field options. Clicking out of the field area saves the changes and the red triangle is removed. |